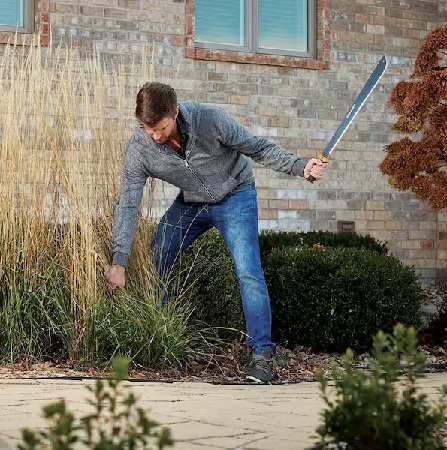
How to Make a Machete Sheath At Home
A machete sheath is a must-have accessory to keep your machete in the best possible shape by preventing it from external dust, debris, and wet weather conditions. Besides these benefits, a machete sheath helps to carry the shape blade easily during hiking, camping, or trailing and keeps you safe from its sharp edges. Most manufacturers offer sheaths with a machete, but there are machetes without a sheath. The first thing is to buy a machete sheath, and another one is to make your own machete sheath. This article will help to learn how to make a machete sheath at home.
Table of Contents
How to Make a Machete Sheath
Before probing into the manufacturing process, it is essential to know that there are different techniques to make a sheath for various tools. Depending on the material, a sheath is manufactured with
- PVC
- Leather
- Wood
- Kydex
Making Leather Machete Sheath
Among all machete materials, leather is one of the most popular materials used worldwide. Let’s take a look at the manufacturing process of leather machete sheath.
Design
First of all, you need to design the sheath. Take your pencil and paper to make a design.
Blade
Remember, you have to make a sheath that accommodates the best machete properly. When you are going to design the blade of the paper, make sure to include all parts of the machete, such as the blade and handle. There are machetes with a saw back, including Gerber Gator.
Sheath
When you are done with the design, draw the sheath around the blade design. Don’t forget to give proper spaces all around the leather sheath. This is because when you enter the machete into the sheath, it should conveniently accommodate the blade. The entering ad drawing must be easy, quick, and comfortable if there is a proper space.
A leather sheath making is effortless as compared to wood, plastic, and metal. You can easily modify and cut the leather material properly without mastering the cutting skill.
Spacer
Make sure to give adequate space between the machete and sheath. A quarter-inch would be the perfect distance between the two. Do not aim for fancy sheath design and keep it simple for the best results.
There are three basic parts of the sheath: the front, the back, and the spacer two.
Your sheath must feature a belt loop and a pouch. However, it depends on your needs to add these features to the machete sheath. For best results, try different variations.
Cutting the Leather Pieces
The most important part of sheath making is to implement drawings to the leather in the best possible way.
Transfer Your Drawing
Place the leather on your cutting board and then the design on the leather piece.
The tricky task is to transfer your drawing from the paper to the leather. You can also use a stylus of any pointed object by which you can place the edges and corners of your drawings onto the leather part.
Remember; don’t displace the paper at any point. If you don’t so, the drawing will be inaccurate.
When you are done with it, remove the paper. Now, connect all the dots and points created earlier and give them a nice shape of the sheath.
Cutting
You can use a pencil or any material for your convenience. However, the pencil is recommended for leather drawings. The best part is all leather linings will disappear easily without erasing them. Carefully draw the curves as they can be a bit tricky compared to other sheath parts.
Now use the razor blade to cut the lines. Make sure to prevent your fingers from cutting. Use safety gloves for the best protection. Cut all the parts carefully as there is no turning back from here.
Take an extra tail-like part to make the belt loop. Fold it over to create a belt loop.
Main Parts of Leather Machete
It’s time to make separate panels, such as the front panel and back panel. It is an easy task as the first panel aids in making the second part. Get the shape out of the first part and make adjustments if needed.
The first part will be the spacer with similar dimensions to the front panel. The most important part of this step is that it has less spacing on the inner side. All three parts should be attached to complete the leather sheath.
Designing on the Leather Sheath
If you don’t want to design on the sheath, skip it. However, it can help to improve the appearance of the sheath.
First Step
Consider a hard surface such as stone, glass, or wood surface for this technique. Never use pressure-sensitive surfaces. Again take your pencil and the tooling kit.
Soak the leather into hot water for fifteen to twenty minutes. This is essential as it helps the leather to hold the design.
Second Step
Make the design on the leather with the help of a pencil. Now apply the tool kit onto the pencil marks to complete the design.
If you want the marks to get deeper, press the kit without moving it. For medium impressions, move it along the surface and apply decent pressure on the surface.
Putting It Together
For best results, use leather sewing thread. However, you can combine leather sewing thread with other adhesives for more improved results.
For adhesives, spread them around the border of the sheath parts that you are going to glue. Wait for fifteen minutes so that the glue gets strong and ready for pressing. Use contact cement for the process.
Ensure to prevent the glue from getting on the wrong sides and don’t leave it for a long time.
You can use bolts and screws for joining parts as they are the best tools for making sheaths.
Finishing
Your sheath is now ready to use. However, there are some finishing touches to be done. Clean the borders if there are any remaining. If needed, fill the design with your favorite colors. Cut the rough edges with the help of a razor blade. The last thing you need to do is rub quality wax over the leather sheath to give a dark and shiny appearance.